How to Install a Jandy JEP-R Variable Speed Pump Controller
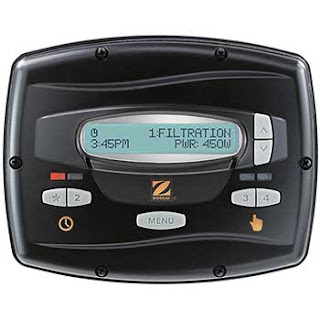
In this article I go over how to install
the Jandy JEP-R Varaible Speed Pump Controller to your Jandy Variable
Speed Pump. If you don't have a Jandy AquaLink System then you will
need to control your Jandy VS pump with the JEP-R controller.
 The JEP-R comes shipped in the open
position and the wiring is pretty basic. There is a cable included
with your new Jandy VS pump that you can use to connect the pump to
the JEP-R. I will go over some details here in this article.
First and foremost, turn off all power
to the pump. Also make sure that the PVC plumbing is sufficiently dry
before wiring and starting the JEP-R, as the pump may turn on during
the programming phase. To learn how to program the JEP-R, refer to
this video:
How To Program a Jandy JEP-R Variable
Speed Pump Controller: https://youtu.be/zI9KgUfYpjE
I also suggest before installing the
JEP-R controller that you also look into purchasing and using Jandy's
new iQPUMP01 interface/controller. The iQPUMP01 is much easier to
set-up and program and is far superior to the JEP-R. Here is a quick
look at the iQPUMP01:
Jandy iQPUMP01 Smart Phone VS
Controller: https://youtu.be/ZAvvAccTBig
I know it seems strange to be steering
you to an alternate controller but that is how much I like the Jandy
iQPUIMP0.
The wiring of the JEP-R is basic. On
the back of the JEP-R there is a connection for the four colored
wires. They are marked easily for easy installation: Red, Black,
Yellow & Green. Just insert the wires and tighten down the screw
with a small electronic type screwdriver. After connecting the wires
to the JEP-R you are ready to wire it the VS pump.
 The VS FloPro in the video and other
Jandy VS pumps comes with an area to wire in the JEP-R. There is also
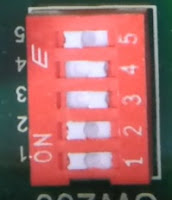
a set of Dip Switches that comes factory set for the JEP-R, so you
can just leave the Dip Switches in the factory set position. Simple
connect the JEP-R for your specific Jandy VS pump – for the VS
FloPRo is Red, Black, Yellow, Green. Once you have these wires
connected and screwed down, replace the back cover on the pump.
If you are using a manual timer box
like the Intermatic brand, there is no need to remove the manual
timer. Simply remove the on/off tabs and set the timer to the on
position. This will effectively bypass the timer and allow you to
control the pump from the JEP-R controller.
Once everything is connected turn the
power back on and see if the JEP-R lights up. If no errors are
present you can now program the JEP-R. It does come factory set with
default programs and default set RPM.
Other Videos in this series:
Jandy iQPUMP01 Smart Phone VS
Controller: https://youtu.be/ZAvvAccTBig
Variable Speed Pump RPM, Watts and Run
Time EXAMPLES: Featuring Jandy iQPUMP01:
https://youtu.be/DlOjwUgv_Yk
Jandy VS FloPro 1.0 HP Pump
Installation Part 1: Unboxing & Walk Thru:
https://youtu.be/qjr2EB2kBMo
Jandy VS FloPro 1.0 HP Pump
Installation Part 2: Plumbing in the pump:
https://youtu.be/EvbJVQvmNBo
Jandy VS FloPro 1.0 HP Pump
Installation Part 3: Wiring the Pump (watching now):
https://youtu.be/RpEXyIdDkK0
How To Program a Jandy JEP-R Variable
Speed Pump Controller: https://youtu.be/zI9KgUfYpjE
Variable Speed Pump, money saving
benefits: https://youtu.be/7PdZTDadZKI
How a Robotic Pool Cleaner can Maximize
your Pool's Energy Savings: https://youtu.be/h89CpLnTAqg


Comments
Post a Comment